반응형
▣ 라벨(Label)
CustomTkinter에서 라벨(Label)은 사용자 인터페이스에 텍스트나 이미지를 표시하는 데 사용되는 위젯입니다. 이는 Tkinter의 기본 Label 위젯을 확장하여 더 현대적이고 커스터마이징 가능한 스타일을 제공합니다. CustomTkinter는 깔끔하고 세련된 디자인을 위해 테마와 스타일을 지원하며, 라벨은 주로 됩니다.
CustomTkinter 라벨의 주요 특징
- 텍스트 표시: 주로 문자열을 화면에 표시합니다. 예: 안내 메시지, 제목, 설명 등.
- 이미지 지원: 텍스트 대신 또는 텍스트와 함께 이미지를 표시할 수 있습니다.
- 스타일 커스터마이징: 글꼴, 색상, 크기, 배경 등을 사용자 지정할 수 있습니다.
- 테마 지원: CustomTkinter의 테마(예: "dark", "light")에 따라 자동으로 스타일이 조정됩니다.
- 간단한 사용: 다른 CustomTkinter 위젯과 통합하여 일관된 UI를 구성할 수 있습니다.
import customtkinter as ctk

# 루트 창 생성
root = ctk.CTk()

# 라벨 생성
label = ctk.CTkLabel(master=root, text="안녕하세요, CustomTkinter!", font=("Arial", 16))

# 라벨 배치
label.pack(pady=20)

# 메인 루프 실행
root.mainloop()
주요 매개변수
- master: 라벨이 배치될 부모 위젯(예: CTk 또는 CTkFrame).
- text: 표시할 텍스트 문자열.
- font: 텍스트의 글꼴과 크기 (예: ("Arial", 16)).
- text_color: 텍스트 색상.
- image: 표시할 이미지 (CustomTkinter의 CTkImage 객체 사용).
- compound: 텍스트와 이미지를 함께 표시할 때 배치 방식 (예: "left", "right", "top", "bottom").
- fg_color: 라벨의 전경 색상.
- bg_color: 라벨의 배경 색상.

text_color 추가 예제 :
TkLabel 위젯의 text_color 속성을 사용하여 텍스트 색상을 설정하는 예제 코드입니다. 이 예제에서는 라벨의 텍스트 색상을 지정하고, 버튼을 클릭하여 텍스트 색상을 동적으로 변경하는 기능을 포함합니다
import customtkinter as ctk

# 루트 창 생성
root = ctk.CTk()

# 라벨 생성 (초기 텍스트 색상: 파란색)
label = ctk.CTkLabel(
    master=root,
    text="CustomTkinter 라벨 예제",
    font=("Arial", 16),
    text_color="blue"  # 텍스트 색상 설정
)
label.pack(pady=20)

# 텍스트 색상을 변경하는 함수
def change_text_color():
    new_color = "red" if label.cget("text_color") == "blue" else "blue"
    label.configure(text_color=new_color)

# 색상 변경 버튼 생성
button = ctk.CTkButton(
    master=root,
    text="텍스트 색상 변경",
    command=change_text_color
)
button.pack(pady=10)

# 메인 루프 실행
root.mainloop()
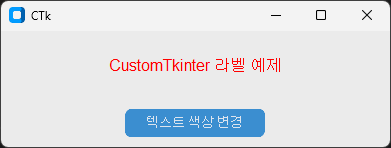
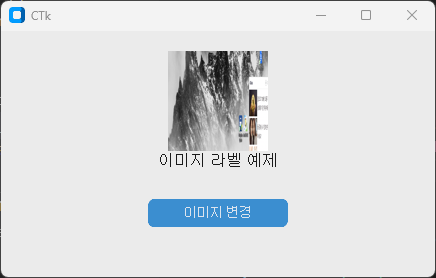
image 예제 코드
import customtkinter as ctk
from PIL import Image
import os

# 루트 창 생성
root = ctk.CTk()

# 이미지 파일 경로 설정
image_path = r"G:\02 Python\PythonTest03\image"
image1_file = os.path.join(image_path, "korea01.png")
image2_file = os.path.join(image_path, "korea02.png")

# 이미지 로드 (CTkImage 사용)
image1 = ctk.CTkImage(Image.open(image1_file), size=(100, 100))  # 첫 번째 이미지
image2 = ctk.CTkImage(Image.open(image2_file), size=(100, 100))  # 두 번째 이미지

# 라벨 생성 (초기 이미지와 텍스트 함께 표시)
label = ctk.CTkLabel(
    master=root,
    text="이미지 라벨 예제",
    font=("Arial", 16),
    image=image1,  # 초기 이미지 설정
    compound="top"  # 텍스트를 이미지 위에 배치
)
label.pack(pady=20)

# 이미지 변경 함수
def change_image():
    new_image = image2 if label.cget("image") == image1 else image1
    label.configure(image=new_image)

# 이미지 변경 버튼 생성
button = ctk.CTkButton(
    master=root,
    text="이미지 변경",
    command=change_image
)
button.pack(pady=10)

# 메인 루프 실행
root.mainloop()
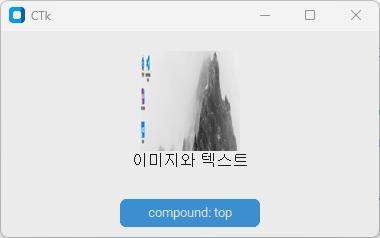
compound 예제 코드
CustomTkinter에서 CTkLabel 위젯의 compound 속성을 사용하여 텍스트와 이미지를 다양한 배치 방식("top", "bottom", "left", "right")으로 표시하는 예제 코드입니다.
import customtkinter as ctk
from PIL import Image
import os

# 루트 창 생성
root = ctk.CTk()

# 이미지 파일 경로 설정
image_path = r"G:\02 Python\PythonTest03\image"
image_file = os.path.join(image_path, "korea01.png")

# 이미지 로드 (CTkImage 사용)
image = ctk.CTkImage(Image.open(image_file), size=(100, 100))

# compound 값 리스트
compound_options = ["top", "bottom", "left", "right"]
current_compound_index = 0

# 라벨 생성 (초기 compound 값: top)
label = ctk.CTkLabel(
    master=root,
    text="이미지와 텍스트",
    font=("Arial", 16),
    image=image,
    compound=compound_options[current_compound_index]  # 초기 compound 설정
)
label.pack(pady=20)

# compound 변경 함수
def change_compound():
    global current_compound_index
    current_compound_index = (current_compound_index + 1) % len(compound_options)
    new_compound = compound_options[current_compound_index]
    label.configure(compound=new_compound)
    button.configure(text=f"compound: {new_compound}")

# compound 변경 버튼 생성
button = ctk.CTkButton(
    master=root,
    text=f"compound: {compound_options[current_compound_index]}",
    command=change_compound
)
button.pack(pady=10)

# 메인 루프 실행
root.mainloop()
 |
 |
 |
 |
추가 기능
- 동적 텍스트 변경: label.configure(text="새로운 텍스트")를 사용해 런타임에 텍스트를 변경할 수 있습니다.
- 이벤트 바인딩: 라벨에 클릭 이벤트 등을 추가할 수 있습니다 (예: label.bind("<Button-1>", callback)).
- 테마 설정: ctk.set_appearance_mode("dark") 또는 "light"로 전체 테마를 변경하면 라벨의 스타일도 자동으로 업데이트됩니다.
동적 텍스트 변경 예제 코드
import customtkinter as ctk
from PIL import Image
import os

# 루트 창 생성
root = ctk.CTk()

# 이미지 파일 경로 설정
image_path = r"G:\02 Python\PythonTest03\image"
image_file = os.path.join(image_path, "korea01.png")

# 이미지 로드 (CTkImage 사용)
image = ctk.CTkImage(Image.open(image_file), size=(100, 100))

# 라벨 생성 (초기 텍스트와 이미지, compound 설정)
label = ctk.CTkLabel(
    master=root,
    text="초기 텍스트",
    font=("Arial", 16),
    image=image,
    compound="top"  # 텍스트를 이미지 위에 배치
)
label.pack(pady=20)

# 텍스트 변경 함수
def change_text():
    current_text = label.cget("text")
    new_text = "새로운 텍스트" if current_text == "초기 텍스트" else "초기 텍스트"
    label.configure(text=new_text)  # 텍스트 동적 변경
    button.configure(text=f"텍스트: {new_text}")

# 텍스트 변경 버튼 생성
button = ctk.CTkButton(
    master=root,
    text="텍스트: 초기 텍스트",
    command=change_text
)
button.pack(pady=10)

# 메인 루프 실행
root.mainloop()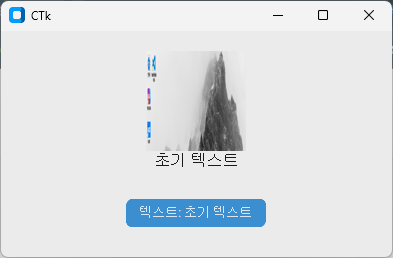 |
 |
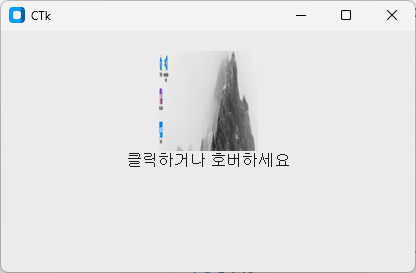
이벤트 바인딩 예제 코드
import customtkinter as ctk
from PIL import Image
import os

# 루트 창 생성
root = ctk.CTk()

# 이미지 파일 경로 설정
image_path = r"G:\02 Python\PythonTest03\image"
image_file = os.path.join(image_path, "korea01.png")

# 이미지 로드 (CTkImage 사용)
image = ctk.CTkImage(Image.open(image_file), size=(100, 100))

# 라벨 생성 (초기 텍스트와 이미지, compound 설정)
label = ctk.CTkLabel(
    master=root,
    text="클릭하거나 호버하세요",
    font=("Arial", 16),
    image=image,
    compound="top"  # 텍스트를 이미지 위에 배치
)
label.pack(pady=20)

# 클릭 이벤트 핸들러
def on_label_click(event):
    current_text = label.cget("text")
    new_text = "새로운 텍스트" if current_text == "클릭하거나 호버하세요" else "클릭하거나 호버하세요"
    label.configure(text=new_text)

# 호버 시작 이벤트 핸들러
def on_label_enter(event):
    label.configure(fg_color="lightblue")  # 호버 시 배경 색상 변경

# 호버 종료 이벤트 핸들러
def on_label_leave(event):
    label.configure(fg_color="transparent")  # 호버 종료 시 배경 색상 복원

# 이벤트 바인딩
label.bind("<Button-1>", on_label_click)  # 왼쪽 마우스 클릭
label.bind("<Enter>", on_label_enter)     # 마우스 호버 시작
label.bind("<Leave>", on_label_leave)     # 마우스 호버 종료

# 메인 루프 실행
root.mainloop() |
 |
Customtkinter 라벨 메뉴얼
CTkLabel | CustomTkinter
Example Code
customtkinter.tomschimansky.com
유튜브 동영상
by korealionkk@gmail.com
반응형
'업무 자동화 > python & CAD' 카테고리의 다른 글
| PyQt - 파이썬 GUI] 설치 (1) | 2025.08.25 |
|---|---|
| Python CustomTkinter #4 How To Create A Textbox (0) | 2025.08.25 |
| Python 학습] 함수 (2) | 2025.08.25 |
| Python CustomTkinter #2 - How To Create A Button (0) | 2025.08.24 |
| Python CustomTkinter #1 - New window (0) | 2025.08.23 |


